
Oster Blade Maintenance Tutorial Step 1: Blade Removal
Attached to this clipper is a #10 blade. The #10 blade leaves about 1/16 inch of hair. Removing the blade from the Oster A5 is quite easy! On the back of the clipper, just below the blade there is a black metal latch. It looks like an L-bracket with a rolled over edge. You need to push that latch up towards the blade: 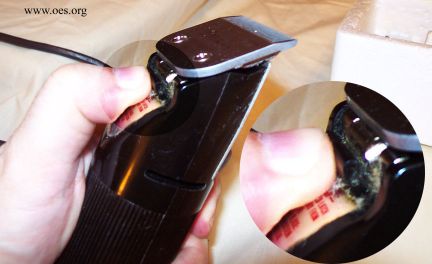
As you can see, it does take some effort to push this latch. While you are holding the latch in, gently pull the top of the blade away from the clipper: 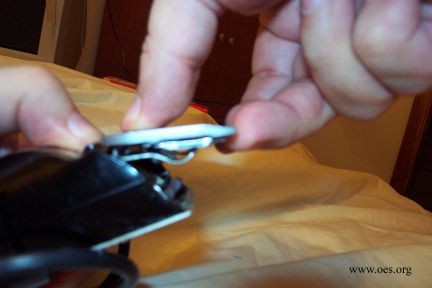
This blade is now in the fully open position. I've turned the clipper sideways to better show what's going on, but I find it easier if the clippers are pointing straight away from you and you pull the blade back towards you. The blade will move only an inch or so, but you should feel it give a little snap when it gets into the open position. The open position is not quite completely vertical; the blade still leans a bit towards the clipper. Once you've pulled the blade into this open position, simply slide the blade up off of the single silver lever that it is sitting on. CAUTION: The lever will need to be in the open position to re-install the blade. Be careful not to push that silver lever in towards the clipper while there is no blade on it! There is a large spring on it, and it will be quite difficult to get it back into the open position. Here is the lever in the open position: 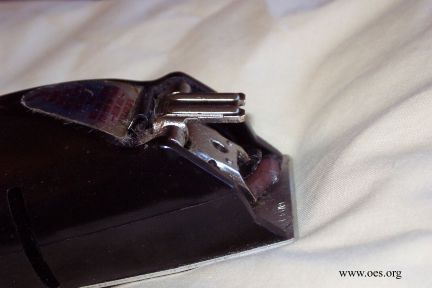
If you should accidentally close the lever, you will need to use a small flat-head screwdriver to pry it back into the open position. Here I am, getting a corner of a screwdriver under the lever. Go at it from the side, and get just a little bit under and GENTLY work the screwdriver under and then up: 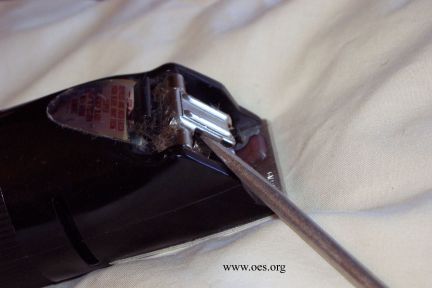
It does come up! Be gentle! 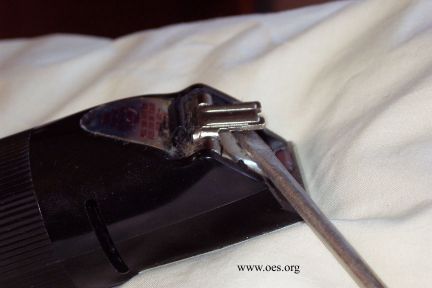
Now move on to cleaning and oiling your blade! |
|
|
Thank you SO much for taking the time to explain this thoroughly! I was about to go crazy trying to remember how to put the blade on.  Fran Barrett |
| thank you for the good illustrations... I had taken a blade out and had somehow closed the lever. I was afraid to use the screwdriver to open it...and was not even sure that is what it needed... Thanks much |
| I knew you had done this a long time ago but never bothered to check when I asked Mr. J to change it... should have!! I think he did it a more complicated way... I remember it being real quick from every time it had been mentioned too. Will have to show this to him for next time. |
| The illustration was most informative since the lever was not in the open position when trying to replace the blade. Thank you. |
| Thank you very much for this graphic explanation. |
| My husband removed the whole assembly. How do I get it back in? Why does it come with the whole assembly? |
| This is an ode to the internet and also to the people who take the time out to help others. Your Blade Removal/Attachment tutorial is still helping others (at least me) in July 2016!!! Thanks so much for the great tutorial. It was driving me nuts and I had to laugh out loud when you detailed how I had to lift the "clip" up with a screwdriver / butterknife. All of a sudden it made so much sense!!! Really, the exclamation marks are a reflection of my gratitude. All the best from Jakarta, Indonesia. |
Didn't find exactly what you're looking for? Search again here:

Custom Search
|
|
| |
|
|
|
|
|