
Basement Bathroom Progress
First and foremost the raised tub area is now complete with ceiling tiles and daylight balanced flourescent lighting which really makes seeing what you are doing infinetely easier.   And don't worry about the dogs and electrical safety. When I finished this ceiling area I considered the risks of water being shaken so hard that it might somehow get past the perspex diffusion panel and into the fixture and even though it was an infinetely small risk I then replaced the circuit breaker for this lighting and indeed much of the remaining basement lighting which is on the same circuit with a GFCI breaker. Finally, the small tube protruding from the diffuser is the drain for the laundry washer overflow safety pan which is located on the main floor directly above the tub. I'll eventual get a friend to machine a better looking acrylic end fitting for this And there are floors. The grout is actually black and usually stands out really sharply but right now it needs a good clean because of construction dust - only so many hours in any given day! I used Carrerra Marble to highlight the room threshold and vanity location although I did have to take the Rona sourced slabs to a local stone countertop fabrication shop to cut these to the size and shape needed. I'm particularly proud of the ceramic tile "skirt board" that I fabricated. With ceramic tile on the wall and porcelain tile on the floor using wood skirt board would have been completely out of place and an invitation to mould. So I decided that tile edged with brushed aluminium metal trim would do the job. Black caulking of course makes that actual vertical to horizontal transition and seal. 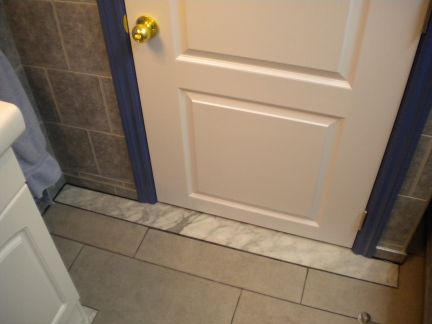 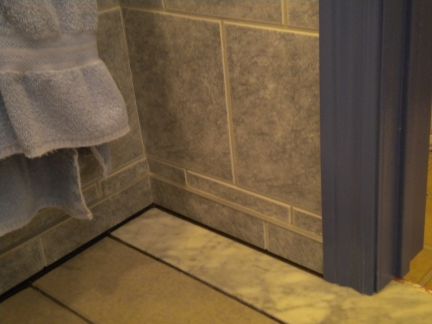 And there are even all the necessary general bathroom fixtures. I also used marble for a "countertop" on the lower floating cabinet which holds general bathroom supplies and "bulk" shampoo stores. The upper cabinet holds the pre-mixed shampoos and conditioners as well as bath mats and other sundry supplies.  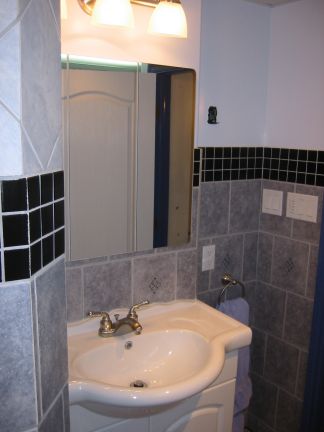 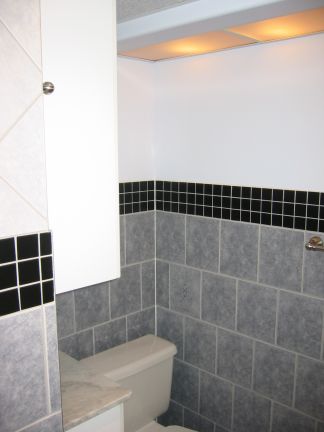  The shower presented it's own set of challenges. Even though I always intended to put a shower rated light in the shower I was concerend that it would be too dark so I decided that a window of some sort was a good idea and I glass block seemed to be an ideal solution. I didn't want simple colourless blocks so after a bit of a hunt I found these blue tinted glass blocks. 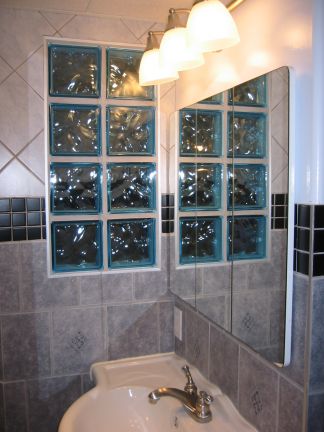 The mirror in these shots is in fact a full medicine cabinet that is "let into" the wall. I hate medicine cabinets jutting out into the room so this one protrudes just enought, about 1/4 in, to get one's fingertips behind the mirror door panels to open them. The shower has been the biggest and most time consuming challenge by far. I wanted the tile pattern to be identical to that around the raised tub and to be as "seemless" as possible around the entryway and the glass block window. So here it is.  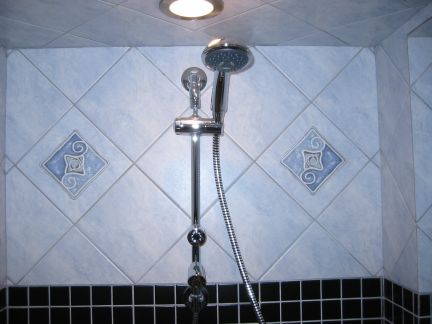 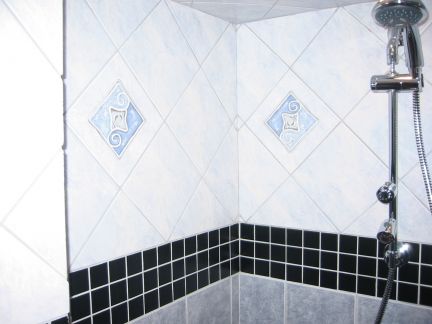 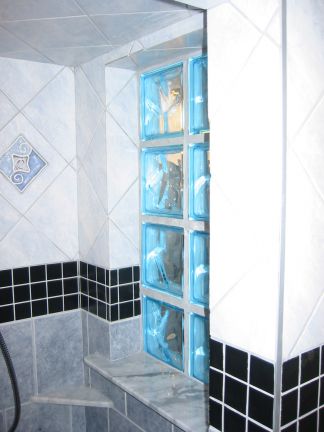 I don't want the window sill used for soap or shampoo storage so a few marble off-cuts made nice corner mounted soap dishes for the shower.  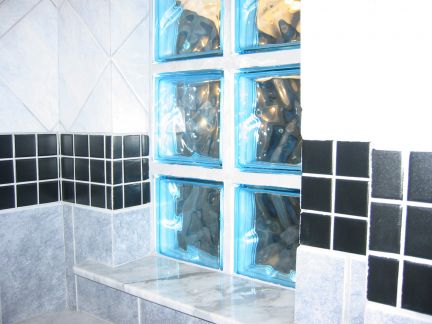 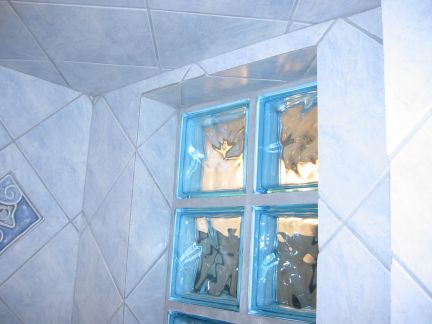 And almost at the end a quick shot of the end wall showing the small bulkhead with lighting that matches that which I put at either end of the grooming room as well as the drop ceiling panels. These are actually fiberglass panels with a thin vinyl facing making them very moisture resistant. The ventilation fan readily removes any significant moisture that builds up in the bathroom anyway so I really don't anticipate any problems with moisture and mould anyway. 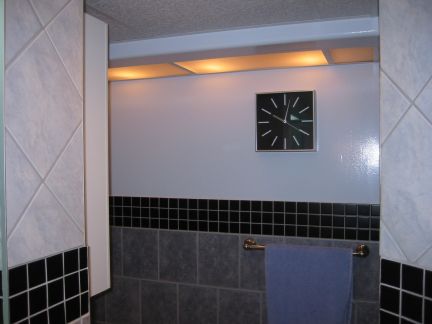 And yes there is a fully functional door. First from the inside, obviously closed, 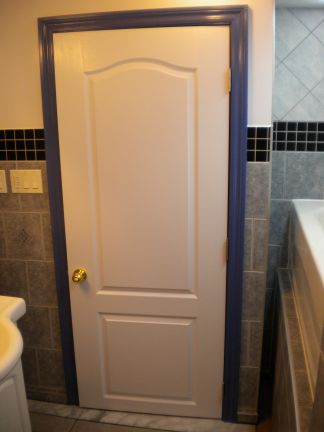 and from the outside looking in. (Yes work in the rest of the basement continues, seemingly forever.) 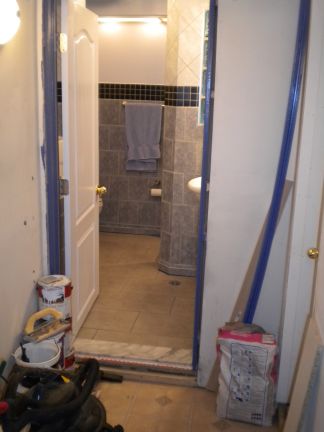 Thanks and Cheers Carl |
|
|
| Very impressive, especially the marble! It's going to be fun when someone buys you home and finds the elevated tub, but Kohler has that new handicap tub that is elevated with the side that slips down. You were just ahead of the time....sorta. |
| WOW! That is gorgeous Carl! Great work! Cindy |
| Very nice! A beautiful room! Nice work- |
| Want to come and visit at my house? I have such an ugly bathroom. I'm so impressed with the fantastic job you did..it's really beautiful. I love the colors you chose and everything looks like high quality work. Great job!!! Marianne |
| Carl, what a beautiful bathroom you've done. I love the blue tinted windows and the lights. The whole bathroom is so nice. It is worth whatever time you put into it. |
| Fantastic job, Carl!! |
| That is Soooo nice. I'm also very impressed!!!!! |
| Your bathroom looks nice and bright. We are renovating our main floor bathroom. There are so many choices of tile and fixtures I am going a bit bonkers. Bravo Carl  you did a great job! you did a great job!peg |
| Great job Carl! All the tile and surfaces look so easy to clean and should last a very, very, long time!!! |
| carl, coming from a long line of construction flaw finders, you can truly take pride in that work. seriously.  |
| Carl, Youre hired!!! Fantastic job!!  |
| I am so impressed, Carl! It looks lovely. |
| Wow! Did you do that yourself? |
| Carl, not only is the bathroom drop dead gorgeous, your narrative is outstanding. But my question is: who gets dibs on the bathroom? The 4 leggeds or 2 leggeds? |
| Paula, That is the four-legged bathroom...we would have to get permission if we used it (not that I will be able to ...can't imagine waiting until I could get there! lol) I'd already gotten a preview..but had to say....lookin' maaaarvelous dearest! Can I come home yet? Oh that's right, I told you I wouldn't ask anymore. *sigh* nice potty room...how is it to have 3 bathrooms and only the doggers to share with...good thing they are all larger...since everyone wants to come in as a group! |
You're a lucky woman Michelle to have such a handy hubby! Most of our guys can't read a grocery list correctly. Sorry guys, couldn't resist that ..... |
| W.O.W. Really, Carl. Wow. |
Didn't find exactly what you're looking for? Search again here:

Custom Search
|
|
| |
|
|
|
|
|