
What I did with my cards from the Holiday Card Exchange ....
I have done the card exchange since 2006 but I seem to have misplaced that first year's cards. Here are the rest of them.... 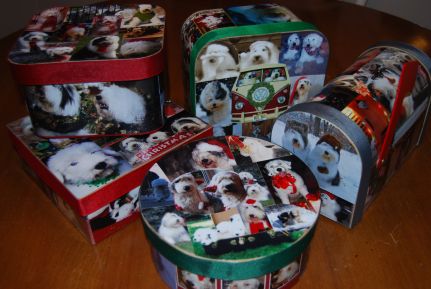 Each box represents a year. I mostly used Christmas themed pictures since that is when they will be displayed. 2007 On the lid - Izzie, Oscar, Chewie, Maize & Hattie, Carl & Toby, Max, Suzi, the Gwynedd puppies, Yuki, Tasker On the sides - Walter, Higgins, Fozzie, Laurel's artwork, Cooper, Shelby, Corky & Fergus     2008 On the lid - Pearl & Heart, Garfunkle & Simon, Winston (MN), Rebecca & Frank, Luna & Tonks, Baloo, Nelson & Sassy On the sides - Duffy, Winston (IL), Panda, Laika, Bella & Nigel  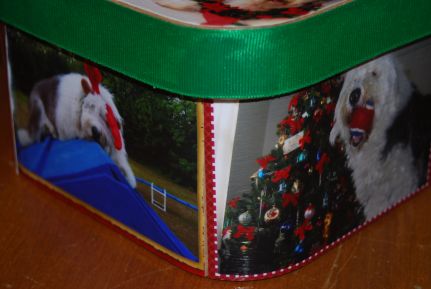 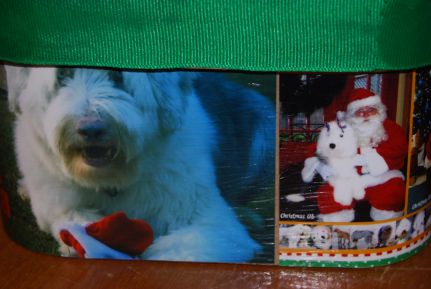 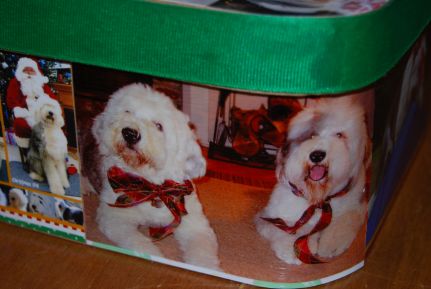 2009 On the lid - Rufus, Walter, Winston & Paislee, Corky (or Fergus), Show Me's OES, Bailey, Chewie, Cuatro, Maggie & Henry On the sides - Mandy's puppies, Laurel's artwork, Winston (IL), Dreamer & Duffy, Violet, Hudson 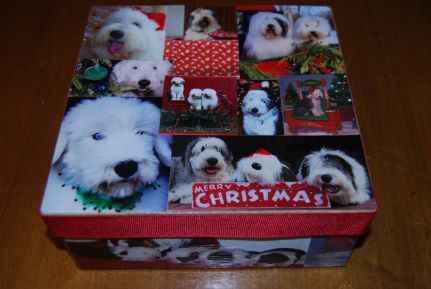 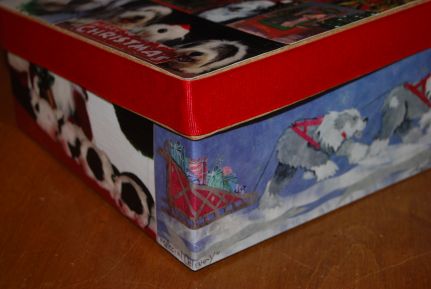 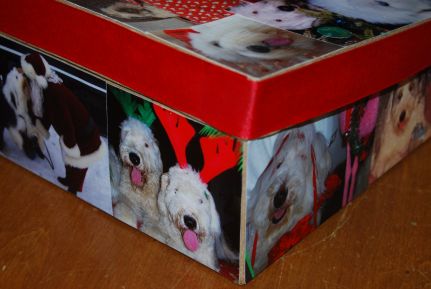 2010 On the lid - Baley, Bowie & Bella, Walter, Gigi, Baxter, Bailey, Nelson & Sassy, Howie, Bogey On the sides - Jose, Mariah & Isaac, Heart & Pearl, Paislee & Winston, Izzie 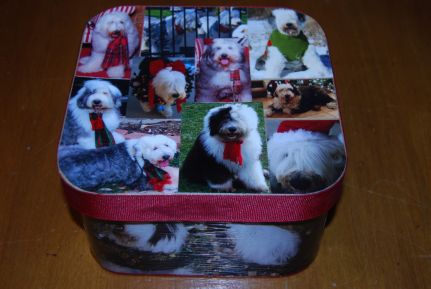 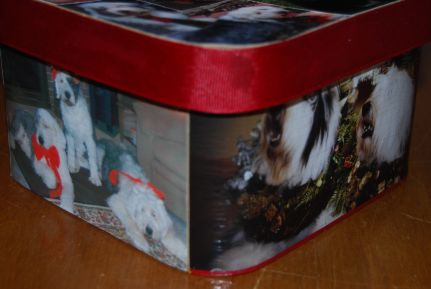 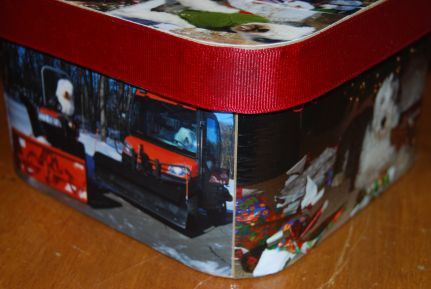 2011 Front lid and right side - Winston & Paislee, Mariah & Jose, Atlas & Stella, Teddy, Asterisk, Wendel & Levi, Sammie, Howie Back and left side - Mady, Oakley & Sydney, Gertie, Chauncey, Tonks, Tilly, Max, Millie 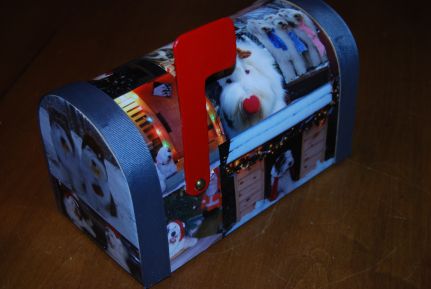 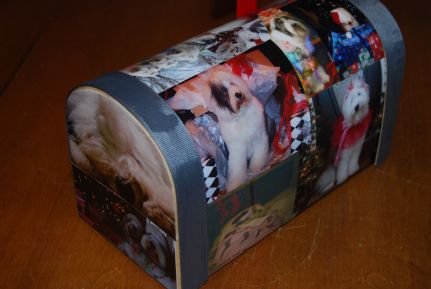 |
|
|
  wowowowow what a great job.. cool idea wowowowow what a great job.. cool idea |
| Those are really cute ideas. I have all of mine in albums. I love looking back at the previous years. |
 What a clever idea~~~you have so much talent.........................  (Can't wait to see them in person on Sunday!!!)...hint..hint... |
Judi, that's an amazing idea!!! It does seem a shame to put them away forever. Very inventive  |
| I would say pay for boxes like that. That was such a creative way to enjoy the pics forever. Love it so much. |
| You are SO creative! I love them! |
| Oh, how cute. And only a totally organized person would know what sheepies are on what box! Job well done, Judi. |
We have all of ours in a pile...  Lovely idea, what will you put in those boxes? |
Those are beautiful, Judi!!  What a great way to keep and use the cards |
| Now I know what kept you busy while your ankle was healing! Those are very cool. So, what kind of glue holds the photos so well on the curved surfaces?? Mine are just in piles by year...and the ones from this year are still up!! |
| Oh WOW!!!!!! I love love love these! I'm SO impressed with your creativity! I want a set too!!!!!!!!Was it very difficult? |
| what a great idea!!! did you poly the top? |
| What a great idea! Love them! |
| Wow Wow Wow!! What a great idea Judi! What a nice way to use the cards--would never have thought of that on my own--thanks for sharing!! |
| that is so great! what a creative idea! |
| I LOVE these! What a great idea! Mine are all just bagged up and packed in with my X-mas decorations The mailbox is my favorite! |
Okay, I NEED to know how those were made!  I love that idea!!! I want to make some I love that idea!!! I want to make some |
| Thank you for all the nice comments. Sadly, like my sewing, you don't want to look too close because I have a lot of cardboard showing at the edge of the lid where the pictures don't quite meet the ribbon. And the glue bled through my ribbon at spots leaving glue stains. I copied all of your questions so I wouldn't forget to answer them. Paula O. wrote: And only a totally organized person would know what sheepies are on what box! Well I won't deny my organization is obsessive at times. However, I thought it would be nice to identify the sheepies year later. So I intend to write all the names of the dogs on the underside of the lid. It makes me kind of sad to see how many of those in my cards are now gone. Baba wrote: what will you put in those boxes? David, I am pretty sure only a man would ask that question. got sheep wrote: Now I know what kept you busy while your ankle was healing! So, what kind of glue holds the photos so well on the curved surfaces?? Ha ha Dawn! I couldn't start a project like this until I was well enough to go box shopping. In fact I just started it last weekend and overworked my ankle with all the standing while I was gluing. There is no glue to hold the pictures on the curved surfaces. Darth Snuggle wrote: Was it very difficult? Are you kidding? This from the talented artist?!!! If you like putting together collages than it is really rather simple. Although I do all of my art and sewing projects mathematically, so it is a lot of measuring. Maybe I take my math skills for granted but I really think Harry could have done this project if he had opposable thumbs. Darcy wrote: did you poly the top? Darcy, the top is Mod Podge. AND if you click on the pictures to make them larger you can see the brush strokes. Even a sponge left brush strokes so I switched back to a brush. Here are basic INSTRUCTIONS for those who are interested - plus hints: This is a simple but time consuming project AND very gluey. Supplies - photos scissors and/or paper cutter plain cardboard craft boxes (available at stores like Hobby Lobby) all purpose craft glue (to glue photos to box) Mod Podge (I used glossy) brushes for applying glue and Mod Podge ribbon (for lid edges) Note: You can use Mod Podge for the whole project but I already had craft glue on hand so I used that plus I think it was cheaper than Mod Podge Instructions - 1) Layout your photos and select your favorites - separate them by size. It is easier to use fewer and larger photos on the sides of the boxes which are harder to work with if they are curved or cornered. Note: Measure the height of your box and keep in mind that sometimes the lid will cover the top of the photo so trim from the bottom of the photo to have as much visible Sheepies as possible 2) Fit your photos to your box, using a piece of tape on the back to lightly hold while you are deciding on your design. Layout your entire design before attaching any photos permanently. Note: I removed the back layer of paper from all thick photo cards and from most of the normal ones so that they would work on the curves of the boxes. Even if it seems paper thin, don't worry it should still hold up to the glue on the back and the Mod Podge. 3) Glue on the photos one at a time. Be sure to coat the back of the photo generously especially at the edges and corners which dry out quickly (don't glop it on though so that it comes out the sides). Smooth out each photo and press down the seams before gluing the next photo. Work the box separate from the lid. Make sure that the glue is holding then allow a few hours to make sure it is dry. NOTE: You will have glue on your hands - this is a messy job! Also, if you get a little glue on the front of the picture don't worry. You will be covering it with Mod Podge. HINTS: Keep a WET cloth handy to wipe the glue off your hands while working and a DRY cloth to dry them before going back to smoothing and pressing. Also, a clean dry cloth can help with the smoothing and pressing. 4) Once the glue has dried you can Mod Podge. Apply very liberally. It is white and thick but dries clear. Note: I put on two coats - let dry between coats. I also brushed in one direction on the lid and then in the other direction on the second coat. 5) Paint the edge of the lid with the craft glue OR use a hot glue gun to attach the ribbon. Most of the time on this project was spent laying out my collage designs. Then there is the wait time between glue and the Mod Podge coats. I hope these instructions were clear enough. If not I can look for a video on youtube on how to apply Mod Podge to photos. |
| What a great idea! Those are awesome! Cindy |
| AMAZING! Judi those are great. Thanks for sharing the photos and the instructions. peg & howie |
Very specific and clear instructions Judi--thanks so much!  |
Didn't find exactly what you're looking for? Search again here:

Custom Search
|
|
| |
|
|
|
|
|