
Oster Blade Maintenance Tutorial Step2-Blade Cleaning-Oiling
Start by brusing any hair out of the teeth of the blade. Brush in the direction of the comb on the blade. 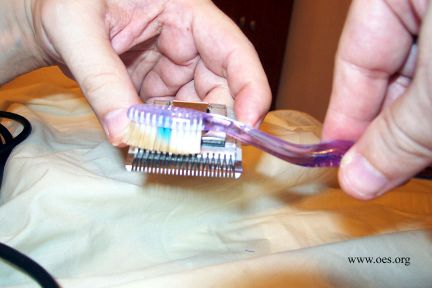
Slide open the blade (don't go too far!) and use your brush to get rid of any hair you can see. When you are happy and hairless, slide it open again and oil the two rails on one side. First the right side top rail near the blades. Do the bottom rail, too. 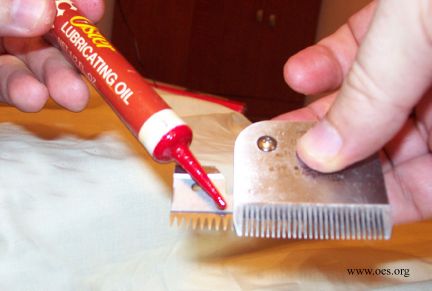
Then slide the blade out in the opposite direction, and do the left side. I'm doing the bottom rail. Do the top rail, too. 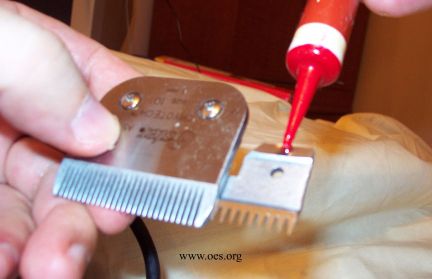
Now I flip the blade over and lubricate the running rail, even though this isn't in the Oster Manual. 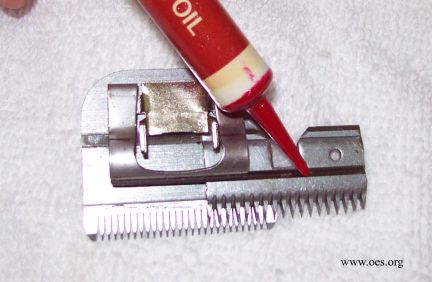
Next we are going to go one step further than Oster recommends and oil the face of the blade for cosmetic protection. Since most of us don't use our clippers and blades every day, let's oil the blade to prevent any cosmetic rusting in storage. Place a nice drop of oil on the face of the blade. 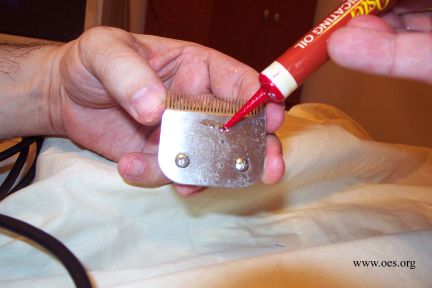
Using a specialized tool (my fingertip) spread the oil over the face of the blade. 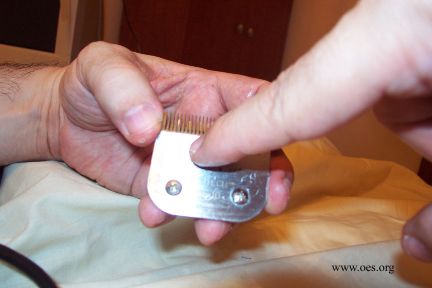
Why do I do that last step? Experience. This is my formally nice Oster #5 Skip Tooth I didn't oil the blade before storage. 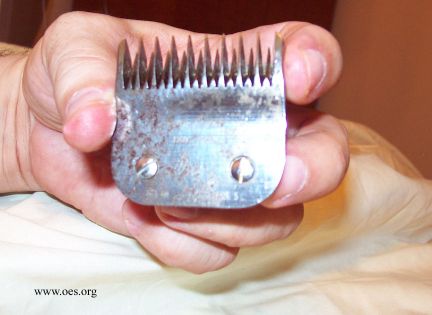
If you store your blade on your clippers, slide that blade back over the level on the clipper, turn your clipper on and snap the blade into position. You're done! |
|
|
| Nice job Ron. I don't think I've ever taken mine apart to oil them, I just drop the oil on while running. I'll have to take it apart and see what I've been missing. |
| Don't take it apart, just slide it to the side. If you undo the screws you will have to bring it to a pro to have it re-assembled to the proper tension. |
Ron wrote: Don't take it apart, just slide it to the side. If you undo the screws you will have to bring it to a pro to have it re-assembled to the proper tension.
Now you tell me!! Twice a year I just take them to Ryans pet supply...they do all of that for me....should I be doing this after every haircut??? |
| I never even take the blade off mine, I just oil the heck out of it while it's running too. I use canned air to clean it out, then a bit of oil before putting it away. |
| This is great, Ron! Very useful and informative!!
I wish I'd had this guide last year when I first bought the clippers. I'm amazed at the lack of information that comes with the Osters when you purchase them. I took mine all apart. Completely. Fortunately, I had a retired pro groomer fix them for me. |
| So pleased I found this site, I was completely lost on how to put blades on Oster A5 clippers. I have now printed everything, the memory starts to go as you get older.LOL. Manage to put them on first time with the easy to understand information with pictures. Thankyou |
| Thank you for the tips! I easily took the blade off of my Oster Golden A5 to clean it, but then couldn't get it back on. Very frustrating! And the "instruction manual" is a joke. There are no instructions in it! I would have never figured out that the tongue must be elevated in order to put the blade back on if it hadn't been for your photos and information. THANKS SO MUCH!!! |
Didn't find exactly what you're looking for? Search again here:

Custom Search
|
|
| |
|
|
|
|
|